问答平台(8),阿里云部署
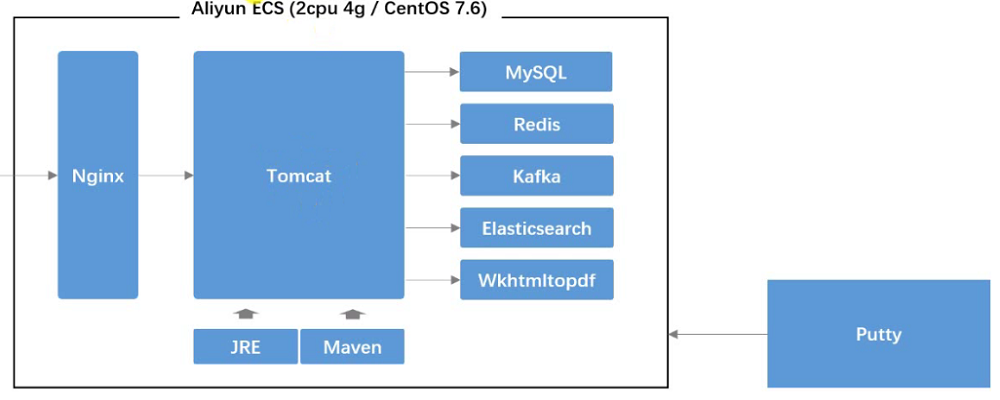
部署环境
centos 版本
cat /etc/redhat-release
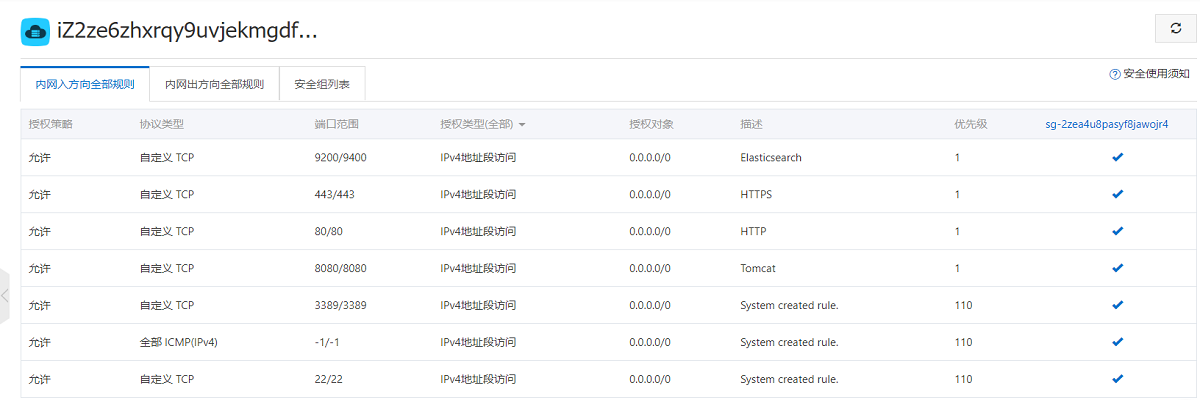
阿里云服务器控制台
重置实例密码(智慧校园)
Xshell
连接到云服务器
Xftp
连接到云服务器
unzip
1 | |
JDK
1 | |
maven
1 | |
- settings.xml
1
2
3
4
5
6<mirror>
<id>alimaven</id>
<mirrorOf>central</mirrorOf>
<name>aliyun maven</name>
<url>http://maven.aliyun.com/nexus/content/repositories/central/</url>
</mirror>
mysql
- 安装
1
2
3
4
5
6
7
8cd /
yum list mysql*
cd /root
ll
yum install -y mysql80-community-release-el7-3.noarch.rpm
cd /
yum list mysql*
yum install -y mysql-community-server.x86_64 - 修改 root 用户密码
1
2
3
4
5systemctl start mysqld
systemctl status mysqld
grep 'password' /var/log/mysqld.log
mysql -u root -p
alter user root@localhost identified by 'xxx'; - 数据库文件初始化
1
2
3
4
5
6
7
8
9
10
11cd /root
ll
unzip -d /root community-init-sql.zip
mysql -u root -p
create database community;
use community;
source /root/community-init-sql/init_schema.sql
source /root/community-init-sql/init_data.sql
source /root/community-init-sql/tables_mysql_innodb.sql
show tables;
select id, username, header_url from user;
redis
- 安装
1
2
3cd /
yum list redis*
yum install -y redis.x86_64 - 启动
1
2systemctl start redis
systemctl status redis
kafka
- 安装
1
2
3cd /root/
ll
tar -zvxf kafka_2.12-2.2.0.tgz -C /opt - 配置
1
2
3
4
5cd /opt/kafka_2.12-2.2.0/
ll
cd config/
vim zookeeper.properties
vim server.properties - 启动
1
2
3
4
5pwd
cd ..
bin/zookeeper-server-start.sh -daemon config/zookeeper.properties
nohup bin/kafka-server-start.sh config/server.properties 1>/dev/null 2>&1 &
bin/kafka-topics.sh --list --bootstrap-server localhost:9092
elasticsearch
- 安装
1
2
3
4cd /root/
ll
tar -zvxf elasticsearch-6.4.3.tar.gz -C /opt
unzip -d /opt/elasticsearch-6.4.3/plugins/ik elasticsearch-analysis-ik-6.4.3.zip - 配置
1
2cd /opt/elasticsearch-6.4.3
cd config/ - elasticsearch.yml
1
2
3cluster.name: nowcoder
path.data: /tmp/elasticsearch/data
path.logs: /tmp/elasticsearch/logs - vim jvm.options
1
2-Xms256m
-Xmx512m - 用户
1
2
3
4
5
6
7
8
9
10
11
12groupadd nowcoder
useradd nowcoder1 -p 123456 -g nowcoder
cd /opt
chown -R nowcoder1:nowcoder *
cd /tmp
chown -R nowcoder1:nowcoder *
su - nowcoder1
clear
cd /opt/elasticsearch-6.4.3/
bin/elasticsearch -d(后台启动)
su -
curl -X GET "localhost:9200/_cat/health?v"
wkhtmltopdf
- 安装
1
2
3
4
5cd /
yum list wkhtmltopdf*
yum install -y wkhtmltopdf.x86_64
yum list *xvfb*
yum install -y xorg-x11-server-Xvfb.x86_64 - 测试
1
2
3
4
5
6
7
8
9
10
11
12cd /root/test/
ll
xvfb-run --server-args="-screen 0, 1024x768x24" wkhtmltopdf http://www.aliyun.com 1.png
ll
cd /opt
vim wkhtmltoimage.sh
xvfb-run --server-args="-screen 0, 1024x768x24" wkhtmltoimage "$@"
ll
chmod +x wkhtmltoimage.sh
ll
cd /root/test/
/opt/wkhtmltoimage.sh http://www.aliyun.com 2.png
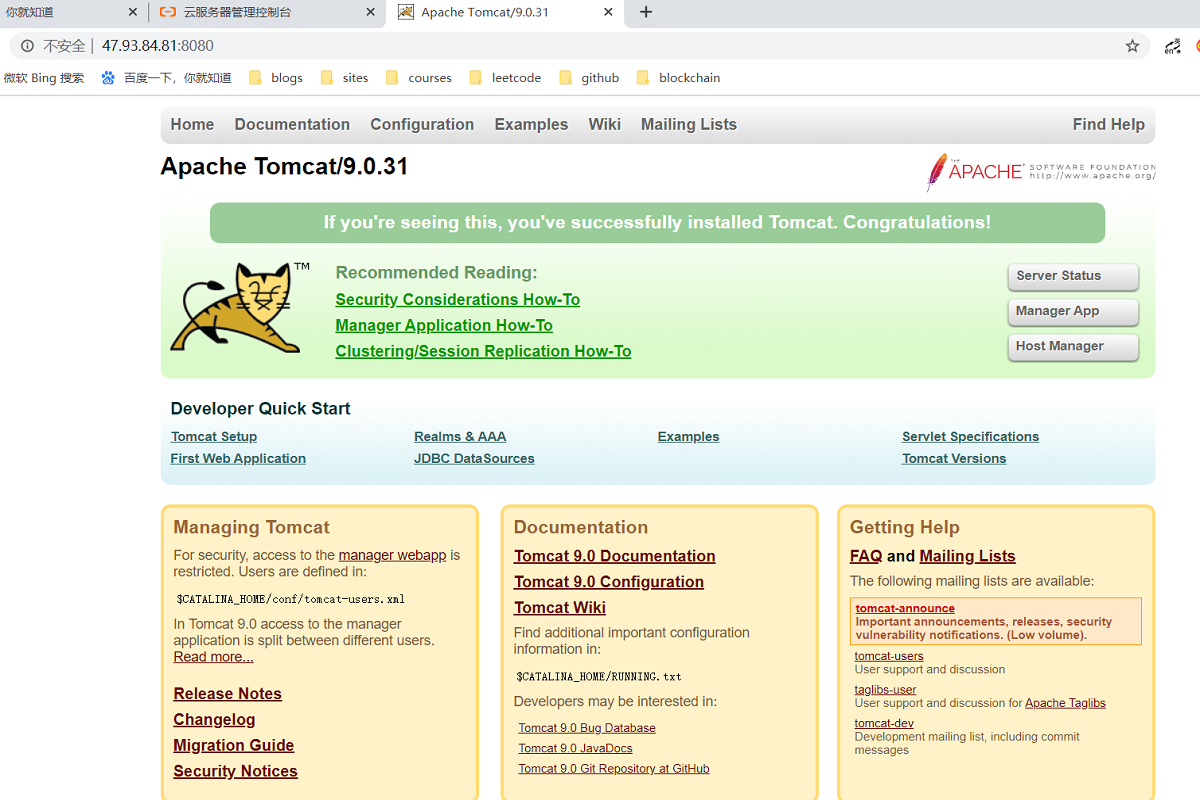
tomcat
- 安装
1
2
3cd /root
ll
tar -zvxf apache-tomcat-9.0.31.tar.gz -C /opt - 配置/etc/profile
1
2
3
4
5
6cd /opt/apache-tomcat-9.0.31/
cd bin/
pwd
vim /etc/profile
source /etc/profile
echo $PATH1
export PATH=$PATH:/opt/apache-tomcat-9.0.31/bin - 启动
1
2
3
4
5startup.sh
cd /opt/apache-tomcat-9.0.31/
ll
cd webapps/
ll
安全组问题
nginx
- 安装
1
2
3cd /
yum list nginx*
yum install -y nginx.x86_64 - 配置nginx.conf
1
vim /etc/nginx/nginx.conf1
2
3
4
5
6
7
8
9
10
11upstream myserver {
server 127.0.0.1:8080 max_fails=3 fail_timeout=30s;
}
server {
listen 80;
server_name 47.93.84.81/;
location / {
proxy_pass http://myserver;
}
} - 启动
1
2systemctl start nginx
systemctl status nginx
部署原理

tomcat
1 | |
修改代码
- application-produce.properties
- global.js
- HomeController
- pom.xml
- application.properties
- application-produce.properties
- logback-spring-produce.xml
- CommunityServletInitializer
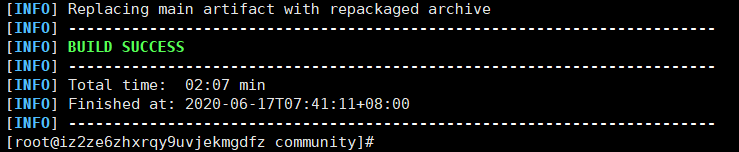
正式部署
- mvn 打包
1
2
3
4cd /root
unzip -d /root community-deploy-Aliyun.zip
cd community
mvn clean package -Dmaven.test.skip=true(忽略测试,第一次会下载比较慢)
- tomcat 部署项目
1
2
3
4
5
6
7
8
9
10
11
12
13
14
15ll
cd target/
ll
mv ROOT.war /opt/apache-tomcat-9.0.31/webapps/
ll
cd /opt/apache-tomcat-9.0.31/webapps/
ll
startup.sh
cd ..
ll
cd logs/
vim catalina.2020-06-16.log
cd /tmp
cd /community
ll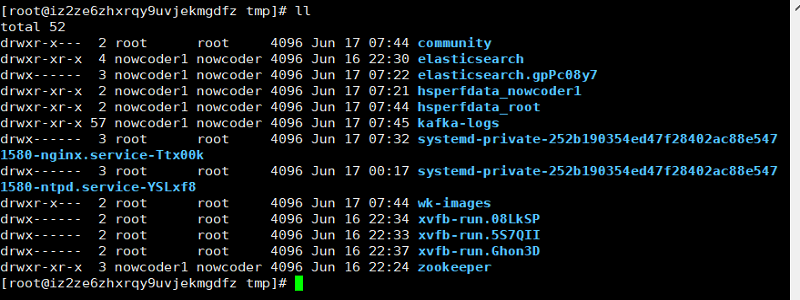
项目部署日志


云服务器访问异常
1 | |
安全组重新设置后,生效时间问题?
云服务器重启后,nginx 没启动…
发帖测试
能点赞,redis 正常。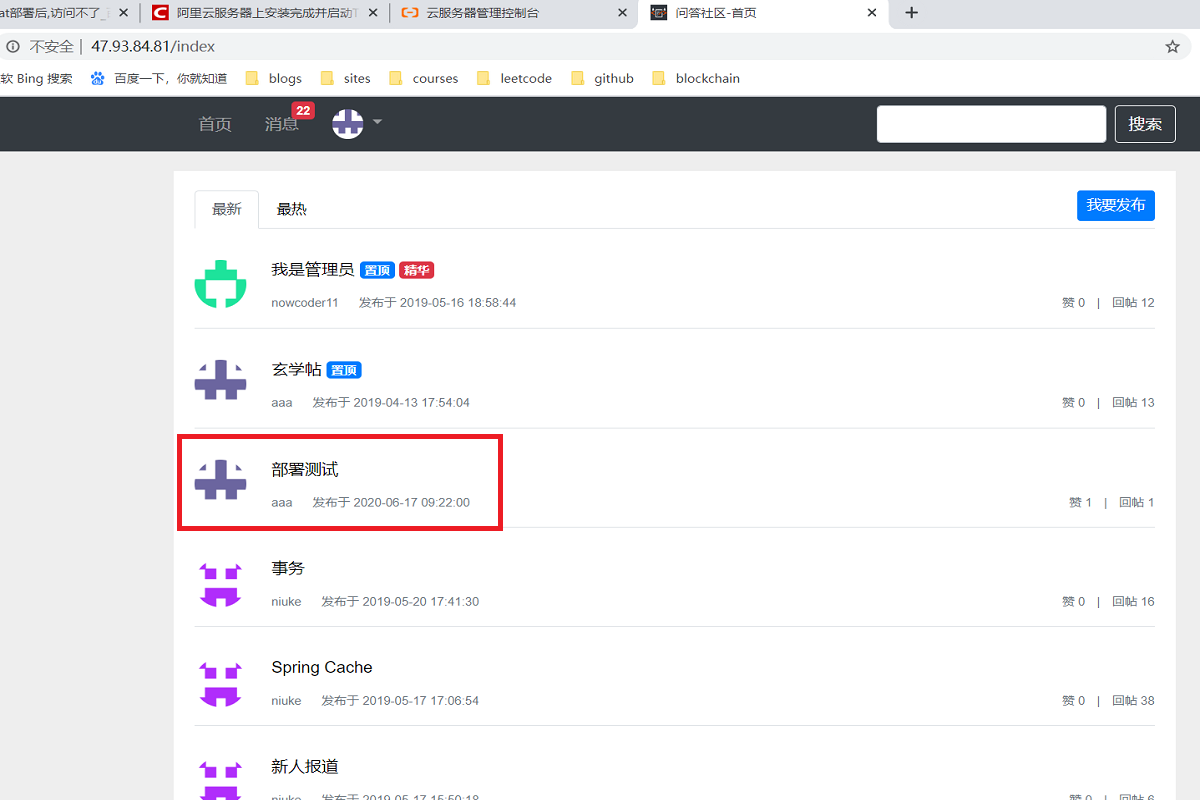
消息测试
能收发消息,kafka 正常。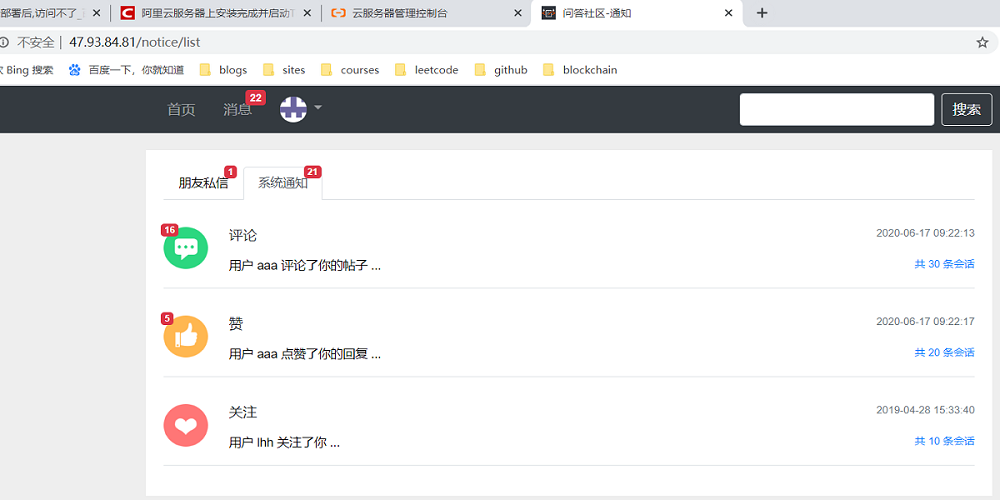
搜索测试
elasticsearch 异常,后来证明是内存不够,待解决。热帖排行,使用 elasticsearch,也异常。
解决方法:CentOS开启虚拟内存
修改头像
修改头像成功,wkhtmltoimage、七牛云正常。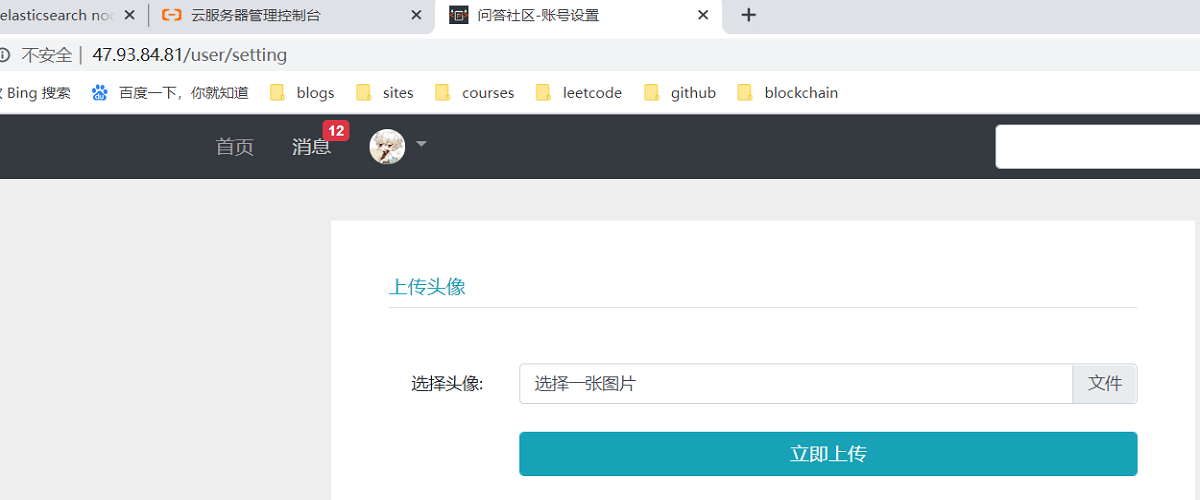
参考资料
Aliyun:
https://blog.csdn.net/pporyy/article/details/87523828
https://yq.aliyun.com/articles/700003elasticsearch:
https://blog.csdn.net/yuanmomoya/article/details/84664382
http://www.voidcn.com/article/p-tefxbmrz-bsb.html
https://www.cnblogs.com/yijialong/p/9707238.html
https://segmentfault.com/a/1190000018816790?utm_source=tag-newestkafka:
https://blog.csdn.net/pbrlovejava/article/details/103451302虚拟内存:
http://www.moguit.cn/#/info?blogUid=36ee5efa56314807a9b6f1c1db508871
问答平台(8),阿里云部署
https://lcf163.github.io/2020/06/28/问答平台(8),阿里云部署/